
On a recent app I worked on, there was a requirement for authentication within a WebView. For this to work custom request headers had to be sent through a Xamarin.Forms WebView. This is quite standard for a lot of hybrid web applications. I found some resources on the topic, however, all were quite outdated and none had reference to Apple’s new AppStore requirement of WKWebView. So let’s jump straight into the code.
Shared Code
This code will allow us to use the CustomWebView in XAML. We can set the header value straight into the XAML or bind it to our ViewModel.
using System;
using System.Collections.Generic;
using Xamarin.Forms;

namespace XamarinHowToCustomHeaders.Controls
{
    public class CustomHeaderWebView : WebView
    {
        public static readonly BindableProperty CustomHeaderValueProperty = BindableProperty.Create(
            propertyName: nameof(CustomHeaderValue),
            returnType: typeof(string),
            declaringType: typeof(CustomHeaderWebView),
            defaultValue: default(string)
        );

        public string CustomHeaderValue
        {
            get => (string)GetValue(CustomHeaderValueProperty);
            set => SetValue(CustomHeaderValueProperty, value);
        }
    }
}
iOS Custom Renderer (WKWebView)
For the iOS custom renderer simply inherit the appropriate ViewRenderer and override OnElementChanged. In here, set the Control to a new instance of WKWebView. Then create a NSDictionary with your desired header key and the CustomHeaderValue that we obtain from the shared code we created beforehand. Create a new NSMutableUrlRequest and set the headers to the dictionary.
using System;
using Foundation;
using XamarinHowToCustomHeaders.iOS.Renderers;
using XamarinHowToCustomHeaders.Controls;
using UIKit;
using WebKit;
using Xamarin.Forms;
using Xamarin.Forms.Platform.iOS;

[assembly: ExportRenderer(typeof(CustomHeaderWebView), typeof(CustomHeaderWebViewRenderer))]
namespace XamarinHowToCustomHeaders.iOS.Renderers
{
    public class CustomHeaderWebViewRenderer : ViewRenderer<CustomHeaderWebView, WKWebView>
    {
        protected override void OnElementChanged(ElementChangedEventArg e)
        {
            base.OnElementChanged(e);

            var webView = Control as WKWebView;

            if (webView == null)
            {
                webView = new WKWebView(new CoreGraphics.CGRect(), new WKWebViewConfiguration());
                webView.SizeToFit();
                SetNativeControl(webView);
            }

            if (e.NewElement != null)
            {
                var headerKey = new NSString("Authorization"); // Change this string for a different header key
                var headerValue = new NSString(Element.CustomHeaderValue);
                var dictionary = new NSDictionary(headerKey, headerValue);

                UrlWebViewSource source = (Xamarin.Forms.UrlWebViewSource)Element.Source;
                var webRequest = new NSMutableUrlRequest(new NSUrl(source.Url));
                webRequest.Headers = dictionary;

                Control.LoadRequest(webRequest);
            }
        }
    }
}
Android Custom Renderer (Android.Webkit.WebView)
The Android custom renderer is very similar to that of iOS. Start by inheriting the appropriate ViewRenderer and override OnElementChanged. In here, set the Control to a new instance of Android.Webkit.Webview. Then create Dictionary<string, string> with your desired header key and the CustomHeaderValue that we obtain from the shared code we created beforehand. Set the WebViewClient to a new instance of a CustomWebViewClient with the dictionary created.
using System;
using System.Collections.Generic;
using Android.Content;
using Android.Views;
using Android.Webkit;
using XamarinHowToCustomHeaders.Controls;
using XamarinHowToCustomHeaders.Droid.Renderers;
using Xamarin.Forms;
using Xamarin.Forms.Platform.Android;

[assembly: ExportRenderer(typeof(CustomHeaderWebView), typeof(CustomHeaderWebViewRenderer))]
namespace XamarinHowToCustomHeaders.Droid.Renderers
{
    public class CustomHeaderWebViewRenderer : ViewRenderer<CustomHeaderWebView, Android.Webkit.WebView>
    {
        Context _localContext;

        public CustomHeaderWebViewRenderer(Context context) : base(context)
        {
            _localContext = context;
        }

        protected override void OnElementChanged(ElementChangedEventArgs e)
        {
            base.OnElementChanged(e);

            Android.Webkit.WebView webView = Control as Android.Webkit.WebView;

            if (Control == null)
            {
                webView = new Android.Webkit.WebView(_localContext);
                SetNativeControl(webView);
            }

            if (e.NewElement != null)
            {
                Dictionary<string, string> headers = new Dictionary<string, string>
                {
                    ["Authorization"] = Element.CustomHeaderValue // Change this string for a different header key
                };

                webView.Settings.JavaScriptEnabled = true;

                webView.Settings.BuiltInZoomControls = true;
                webView.Settings.SetSupportZoom(true);

                webView.ScrollBarStyle = ScrollbarStyles.OutsideOverlay;
                webView.ScrollbarFadingEnabled = false;

                webView.SetWebViewClient(new CustomWebViewClient(headers));
                UrlWebViewSource source = Element.Source as UrlWebViewSource;
                webView.LoadUrl(source.Url, headers);
            }
        }
    }

    public class CustomWebViewClient : Android.Webkit.WebViewClient
    {
        public Dictionary<string, string> headers { get; set; }

        public CustomWebViewClient(Dictionary<string, string> requestHeaders)
        {
            headers = requestHeaders;
        }
    }
}
Using the Custom Control
<?xml version="1.0" encoding="UTF-8"?>
<ContentPage
    xmlns="http://xamarin.com/schemas/2014/forms"
    xmlns:x="http://schemas.microsoft.com/winfx/2009/xaml"
    xmlns:controls="clr-namespace:XamarinHowToCustomHeaders.Controls"
    xmlns:vm="clr-namespace:XamarinHowToCustomHeaders.ViewModels"
    x:Class="XamarinHowToCustomHeaders.Views.WebViewPage">

    <ContentPage.BindingContext>
        <vm:WebViewModel />
    </ContentPage.BindingContext>

    <ContentPage.Content>
        <controls:CustomHeaderWebView
            CustomHeaderValue="{Binding AuthToken}"
            Source="{Binding WebpageUri}"
            HorizontalOptions="FillAndExpand"
            VerticalOptions="FillAndExpand" />
    </ContentPage.Content>

</ContentPage>
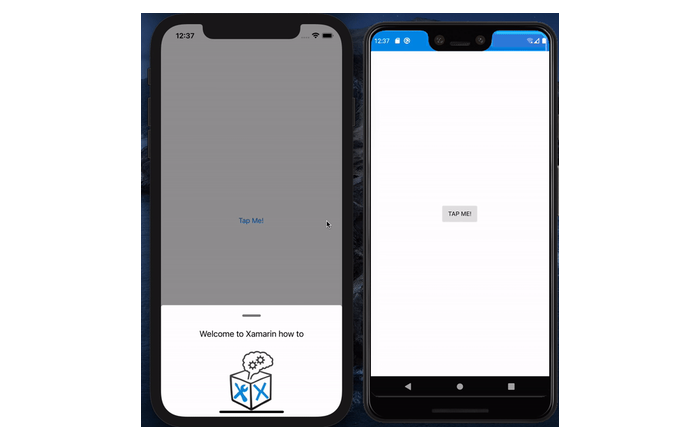
The Result
This webpage shows all of the HTTP request headers that have been sent by the WebView. It can be seen that the Authorization header now shows “Bearer MyCustomAuthorizationToken” which has been passed in via my viewmodel.
iOS

Android

That wraps up the entire project, very simple to modify and add multiple headers if required. Let me know if there are any questions below and I will try to answer them all.
As usual, if you want the entire working example, please have a look here on GitHub.


Leave A Comment